DIY: Bahama Blue Napkins Pt.1
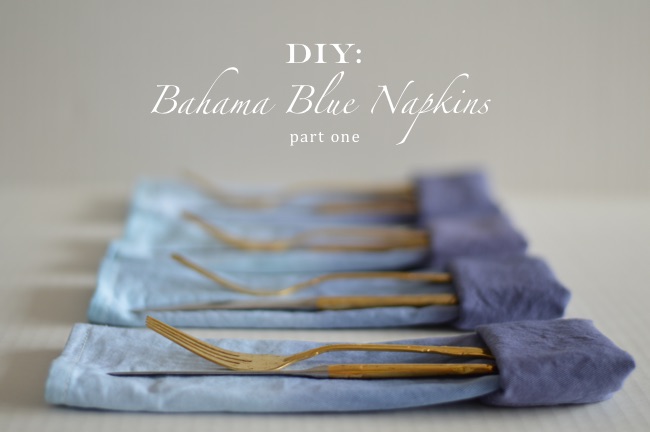
Ombré, a wedding trend that belonged squarely to twenty-fourteen, but one I will strive to keep alive well in to twenty-fifteen. For no other reason than because blue, when graduated from light to dark, beautifully reflects the surrounding waters of the Bahamas and the varied depths that make the archipelago so easily recognizable from space. And let’s be honest, hues such as these will never go out of style – season even. That said, I wanted to show the hands-on DIY bride how easy it is to create ombré dip dye napkins. Unexpectedly, I wanted to weigh down such napkins with a unique design element that is complimentary in colour, but more on that in the next week’s post.

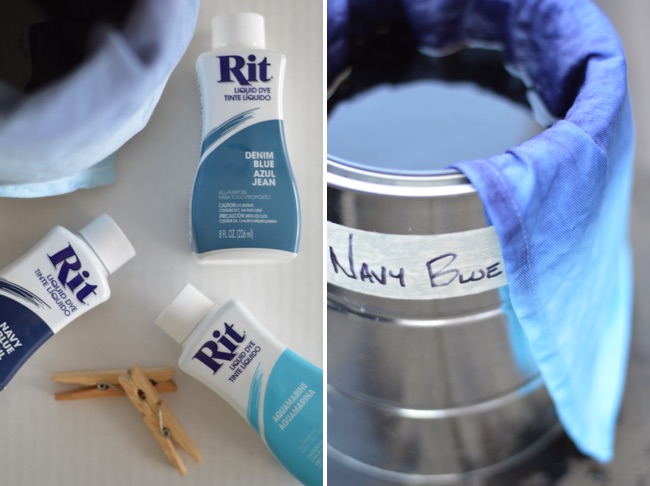
Step 1 – Begin by setting up your workspace. Set a drying rack over an old towel or plastic tarp, reserving two to three clothespins for each napkin you will dye. For each coloured dye you use you’ll need a separate bowl, bucket or if you’re following my lead, a 1 gallon paint can. I chose a paint can as the metal would insulate the heat and keep the water warm for longer. Also the dye wouldn’t stain the metal. I labeled each can according to the colour dyed used and to eliminate any guess-work. Additionally, you’ll need the following: a selection of two to three RIT liquid dyes that are in the same colour scheme, a set of plain white napkins, an empty bucket filled with cold water, salt, and gloves if you prefer to use them.
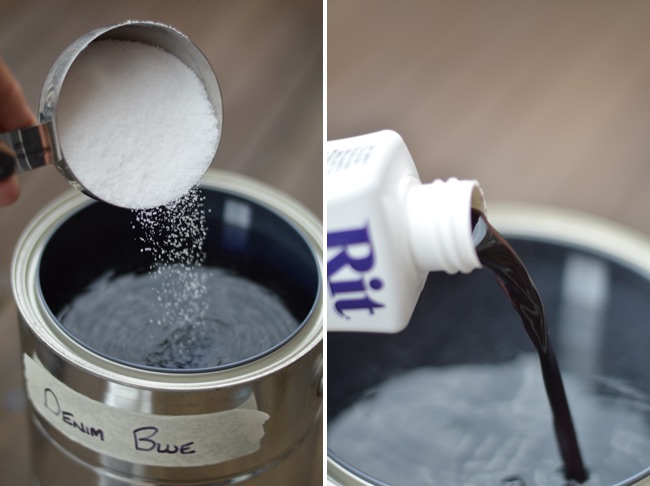
Step 2 – Fill each can with enough hot water to submerge the napkin. While the instructions specify water/dye ratios I did not follow these. Instead I experimented and poured the dye in to the heated water until I reached my desired colour. I used half the bottle of RIT’s Aquamarine dye, half the bottle of RIT’s Denim Blue dye and two-third the bottle of RIT’s Navy Blue. As is the rule of thumb for most DIY experiments, less is more in the beginning. You can always add. Finally, I put a cup of salt in to each bucket. Before moving on to the next step I recommend making a test strip using the same exact fabric you will use going forward. Doing so will help you land on your desired colour scheme and the appropriate time intervals. Also note when the fabric is wet the napkin is darker than it will be when it’s dry.
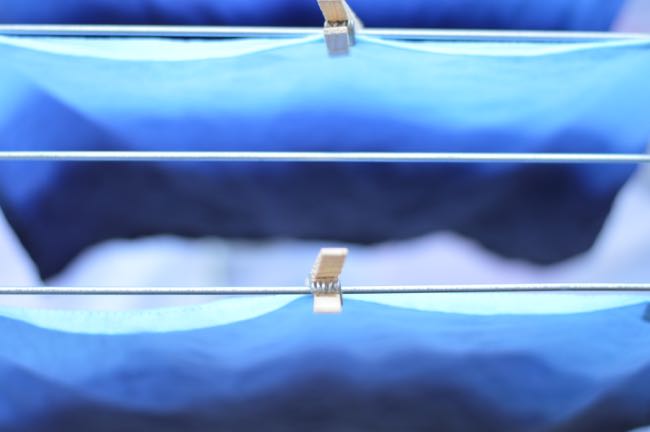
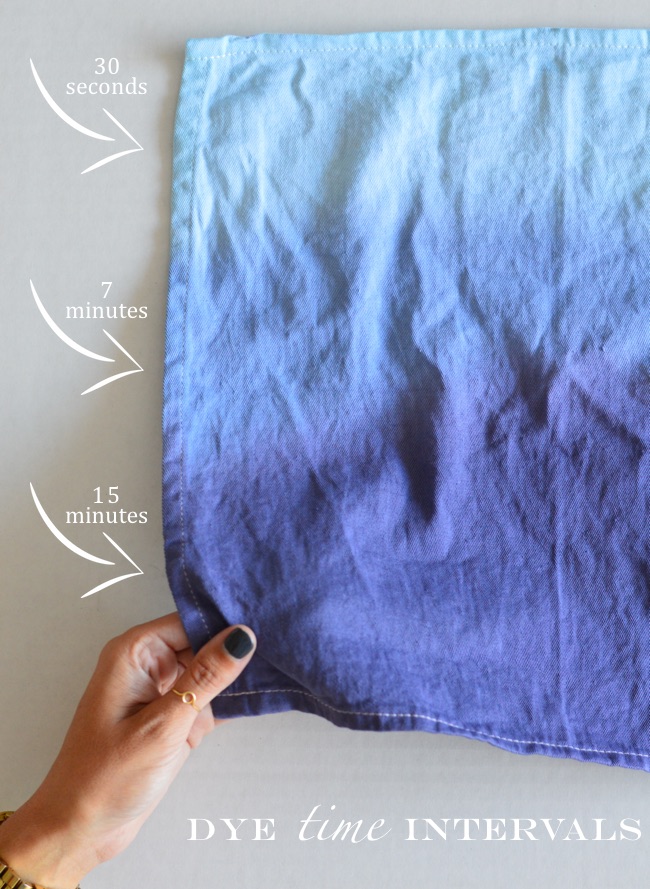
Step 3 – Taking an unfolded napkin (note: when dipping each napkin I always made sure the label was to the top) I dipped the whole napkin in the bucket of Aquamarine for 30 seconds, then wrung out the excess liquid and washed it in a separate bucket of cold water. Taking the same napkin I then dipped it half way in for 7 minutes, then repeating the above washing process. Finally, I dipped the napkin one-third of the way into the final colour, Navy Blue for 15 minutes. On each addition of a new colour I would recommend bobbing the napkin up and down, no more than half an inch, so the colours meld naturally. Allow the napkins to dry overnight and only then are they ready to dress your tablescape.


Join the conversation