Island Inspirations – Melting Crayon Art
Ever since my younger years I have had an borderline obsession with color, no specific primary color – just every shade that it paints. It was not until I began thinking about the creative direction I would take for this post that I realized my obsession is not unfounded. It is simply because of my innate love for the beauty of the Bahama islands.
A friend who is a pilot once said to me, “there is no more stunning of a view than that which is seen when flying over the archipelago that makes up the 700 islands of The Bahamas.” He is a man that speaks no truer words. Every time I look out to the ocean that surrounds our islands I find I need to catch my breath. In equal beauty – to look beneath the surface of the ocean, I mean to really look at it, you will see no lesser of a magnificence. Color and its smooth transitions are every where; whether it is in the red snapper quickly darting by, or the purple sea fan gently swaying to the dance of the ocean. Is it any wonder that such natural beauty has inspired this DIY? Read on…
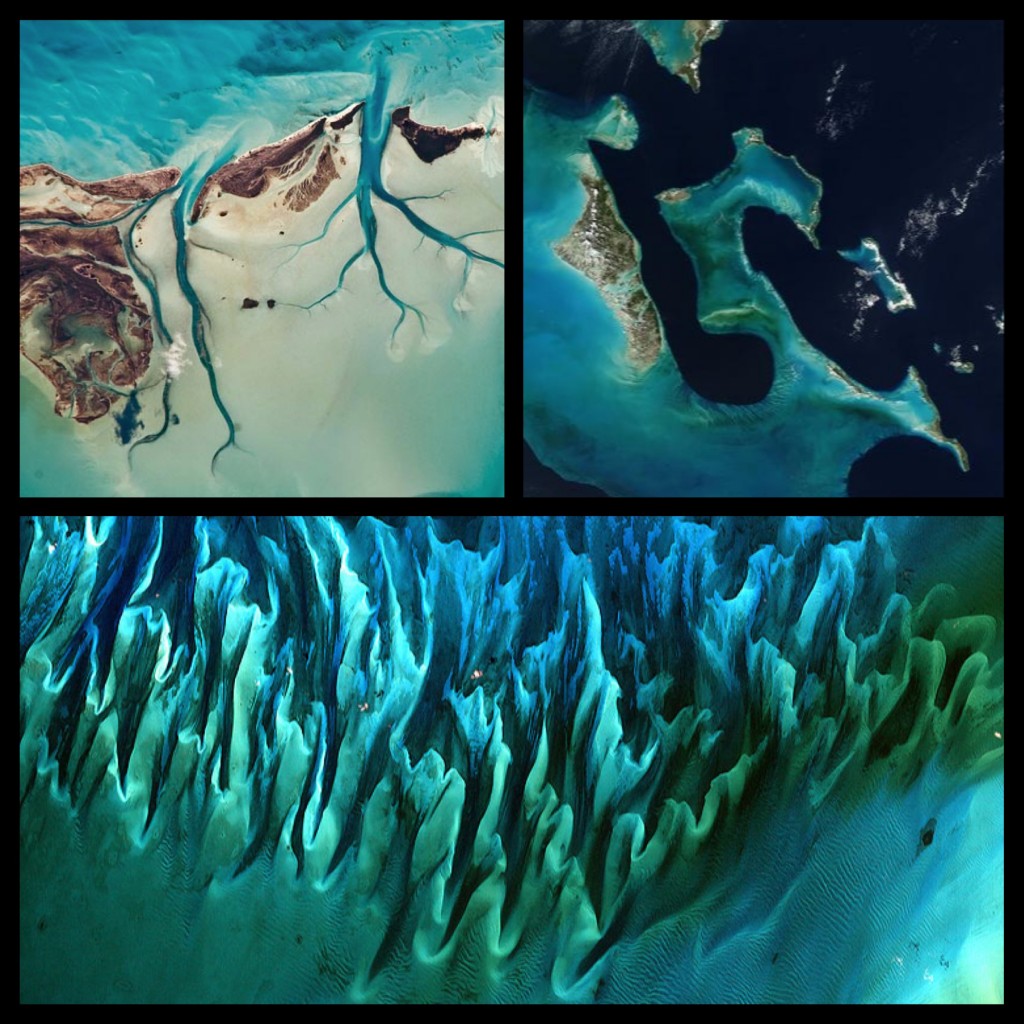
– Satellite images taken over The Bahamas were my inspiration –
WHAT YOU’LL NEED –
- Inspiration – adds an extra dose of challenge to your DIY.
- Blank canvas, choice of size if yours.
- Hot glue gun + of course, glue sticks.
- The obvious – crayons – you’ll need enough that when stacked alongside each other they cover the width of the canvas.
- A sheet of cardboard wider than the width of your canvas, this is important as you don’t want to be blowdrying your DIY partner’s hands. (yes, as you will see I did not follow my own step)
- A DIY partner who will hold the aforementioned sheet of cardboard upright.
- Newspaper, an old sheet or what have you to cover your DIY surface – again important as you will see that the melted wax pools at the bottom of the canvas.
– Step-by-step instructions on how to melt the crayons in to a sea of colour, pun intended –

Tell me what would inspire your crayon melting art project + which colours would you use?
Experience Tips: I liked concentrating the blow-dryer on one area at a time, making my way across the width of the canvas. There were some colours I ooh-and-ahh’d over more than others so I focused the heat on those. After the fact I thought it would be great to paint the canvas first for added colour or to make a contrasting background.
P.S. photo credits – satellite images via here, here + here.

Join the conversation
I’m looking for a way to seal these type of paintings on canvas. Anyone figured out the best method?
I have made three of these with my children using 2 different methods. All three have a theme and a silhouette picture of the children’s choice. The first was a unicorn in a melting Rainbow!! I think it looks pretty amazing. I got in a little close with the dryer and it created these gorgeous flecks on the canvas as well as the drips. Another was a dragon flying over an erupting volcano ( you can only see the lava but the colours are gorgeous, and the last was some dolphins in a sea of blue,green and purple. I changed how I used the hair dryer for this one, and we created a more sponged on effect.
Does the crayon not start to flake or peel from the canvas over time???
I did a rainbow one.My crayons were on the canvas though.
Would the crayon picture need to be sealed with something?
I just saw your art on pinterest and LOVE it!!! I can’t wait to try it, what size canvas did you use…i’m trying to figure out how big I can go. Thanks again for sharing your creativity!
I am going to make these with my new kiddos this Friday. I am going to allow them to make them to enjoy and then make a set to take home and freak their parntes out!!! My question is…if I have each kid make 8…how many bags of each color candy melt do you believe I will need? I plan on doing red, blue, green and yellow crayons. Thanks for the help and the cute idea!!
I really love this idea- I have wanted to make something unique for my house- this will do just that! Thank you ,..GOD BLESS!
Magic erasures take off croyan without touching the paint. They are awesome. Even the off brand kind work wonders, I even got permanent marker off with them. Good luck.
As an artist, and a texture and color love, this is intriguing! This goes on my list of neat ideas to try. Thank you for sharing!
Now if I could only find something to do with this color pencils I bought years ago and never use…………………..
After seeing this on Pinterest it’s been on my mind, haunting my thoughts… I finally have figured put where I would like my art to go and have decided to switch it up a bit – being as I live in Arizona and we have been under a heat advisory for the last week – I am going to put up my canvases with the crayons attached and leave them outside for a long, hot, summer day. I think the slow melting on the wax might bring on a very cool effect. I will take pics and share (if it goes according to plan!) wish me luck!!
Jacquelin Schmittou, I live in Arizona, too how did your canvas come out?
Using the sun (before the temp drop and recent monsoons) was a lot easier than using the blow drier!! The sun was able to completely melt all of the crayons simultaneously, with little to no effort from me; I literally took the canvas outside, propped it up with the crayon board on top, and left it for a couple of hours. I then went and got the canvas and brought it inside, let the wax harden and then manipulated it with the drier. I was very pleased with the results. I will post pics as soon as I’m able.
I have seen several of these posts and have wondered if it would be possible to add something over the crayon. I don’t think paint would adhere, but I’d love to incorporate a silouhette or picture in some way. any thoughts on this?
This type of art has inspired me to get rather creative in more ways than I can mention. I have always loved canvas art but not having a great amount of art ability ( crafts yes, art, not so much) ha! This is going to allow me to really get creative in a whole new light as well as make my best friend a lovely piece of art for Christmas. I will post a picture soon of the one I have completed. Again, thank you for the inspiration.
I really love this idea- I have wanted to make something unique for my house- this will do just that! Thank you 🙂
Saw your post on pinterest and just wanted to tell you how much I loved your “painting”.
Thank you for taking the time to tell me Jess! xxVP
Hi Shawn, so glad you like this! I wouldn’t recommend doing it without the paper on the crayons as I imagine controlling the melting, the direction + the amount, will become difficult to do. Also you’ll find some colours melt more quickly than others, oddly. Think it is great to try with your class! It would be neat to take it to the next level and add a bit of a challenge to the project by having your students pick an impressionist or post-impressionist painting that inspires them, and then they use the colours found in that painting. Imagine Monet’s “The Water Lily Pond” or Degas’ “Miss La La at the Cirque Fernando” or even Van Gogh’s Chair as inspiration, the colours are beautiful in these! I would love to see the finished products, if you have the time please share them on The 700 Experience Facebook page! Also if you have any questions about any of the steps let me know! xxVP
beautiful! have you tried it without the paper on the crayons? would that make them melt too quickly? i am thinking of trying this with a high school fine arts survey class as part of the color section. so many tie-ins with art and aesthetics.
That is beautiful. My granddaughter is extremely talented when it comes to art. I’m going to tell her about this.